Hello! This is a guide on how to use RUBI Wallet 1.0 for you!
RUBI Wallet 1.0 is a special wallet designed to store and protect your mined digital assets. It's simple, user-friendly, and secure.
Conditions to create RUBI Wallet 1.0:
You only need a RUBI mining account to create a wallet, even if the account hasn't completed KYC verification.

Creating your personal wallet:
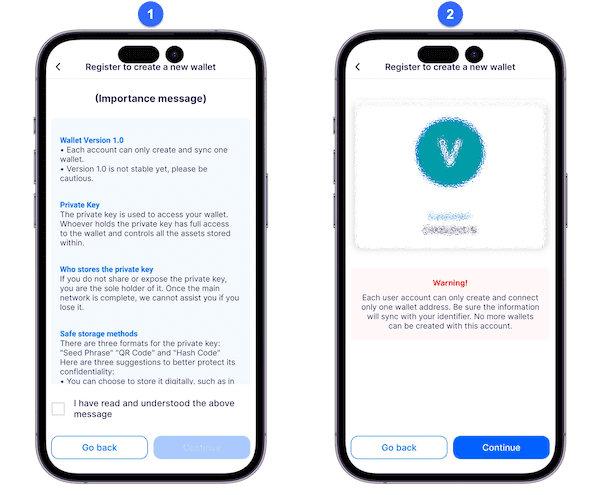
Step 1: Update the app to the latest version on July 15, 2023, and click "Wallet" to start the wallet creation process. You will see important notices.
Step 2: Review your account information, which will be synchronized with the wallet.
• First, read important messages.
• Then check the information to be synchronized for your account and wallet.
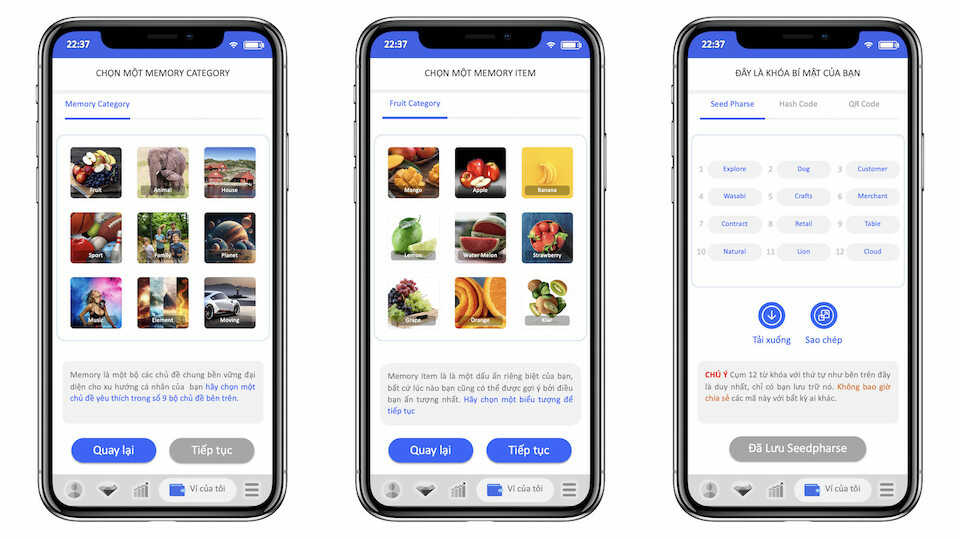
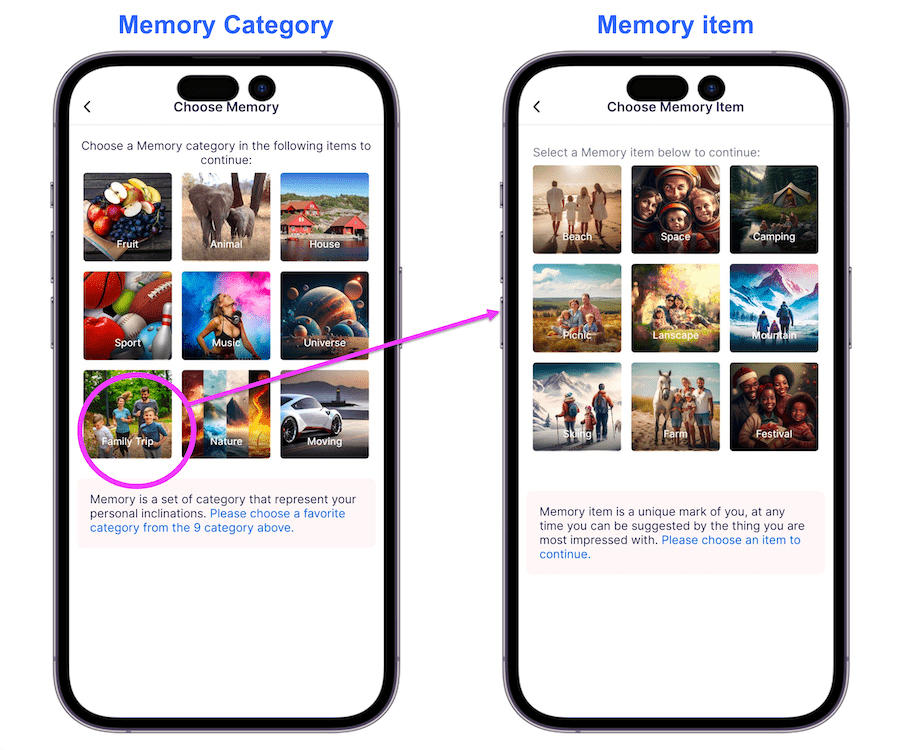
Step 3: You'll go through a visual screen with popular "Memory Categories" to choose your interests. After selecting, you'll move to the next screen to choose a "Memory Icon" remember your choice. Then, you'll proceed to the secret key creation screen.
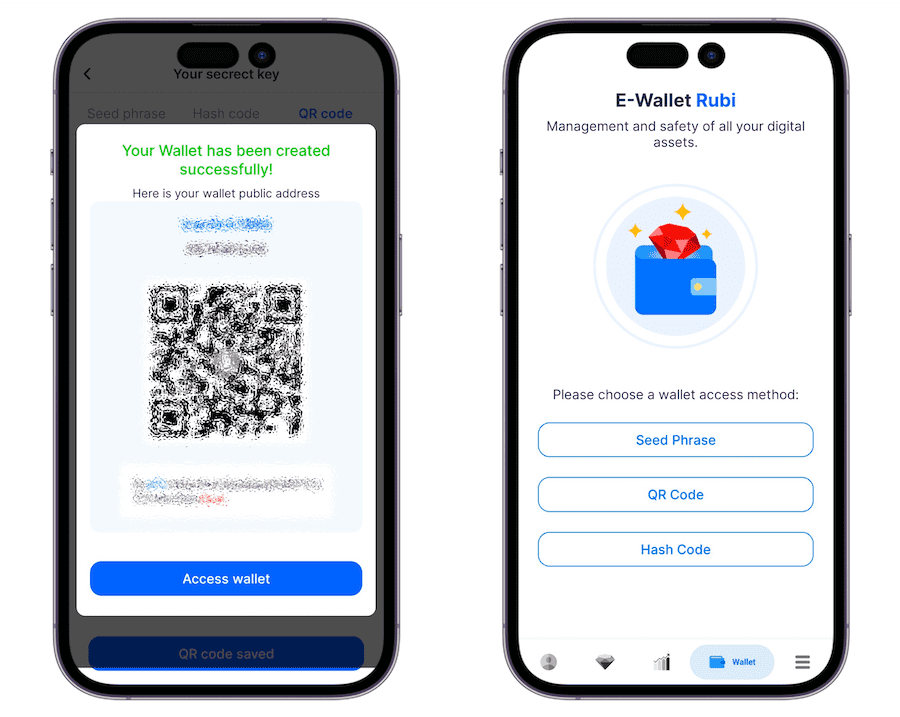
Step 4: Create a secret key for your account, which will be displayed in 3 different formats (Seedphrase, QR-Key, Hash-Key). Store all 3 formats to complete the wallet creation.
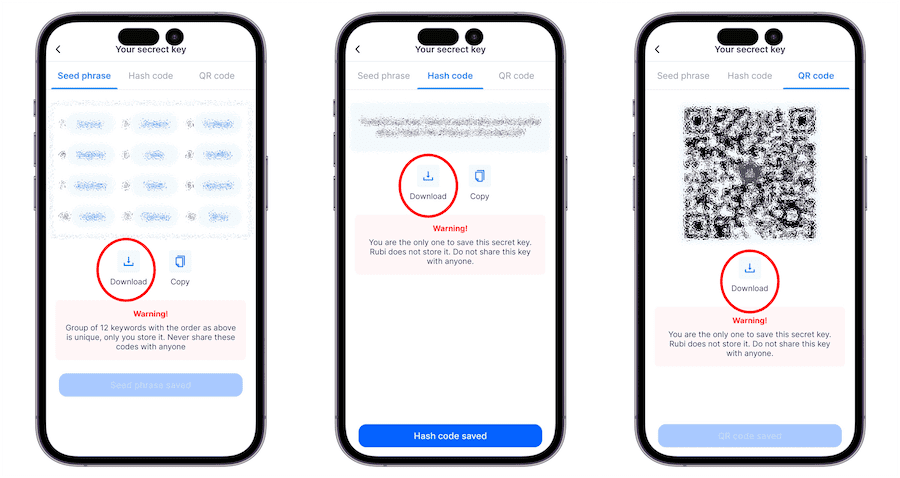
Important note: Keep your secret key private and don't share it with anyone, also be careful not to confuse it with the public key.
Step 5: After completing the wallet creation, you'll receive a public wallet address and can start accessing the wallet immediately.
Transferring assets to the wallet:
Note: Since this is a free project, we need to verify the identity of miners for mining and generating assets.
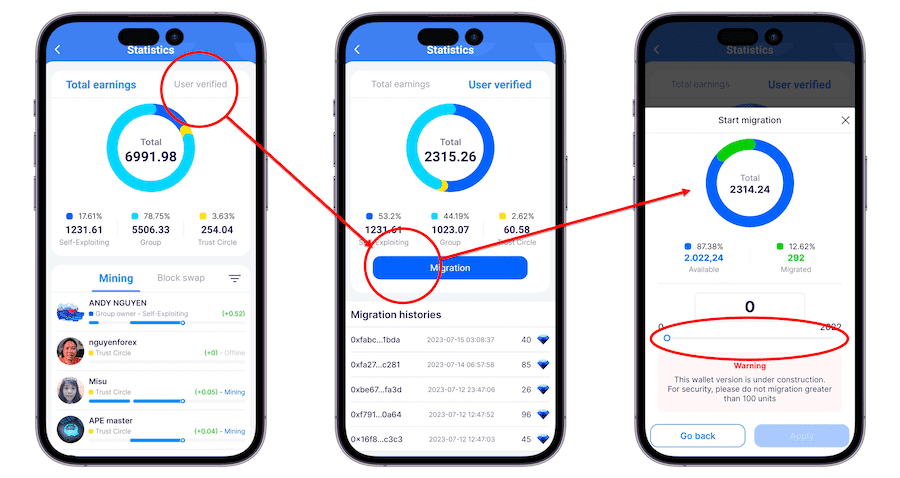
Step 1: From the app menu, select "Mining" and access "Statistics."
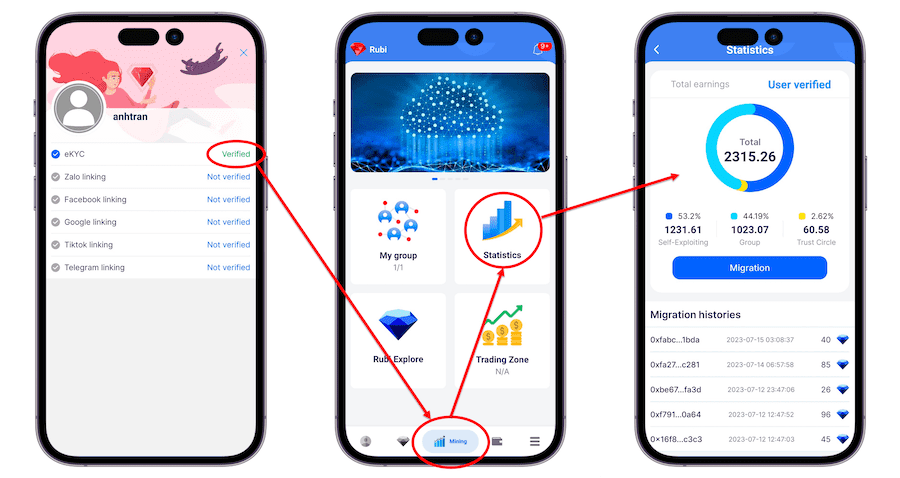
Step 2: In the statistics screen, select "Verified" (only verified KYC users can access this function), then you'll see the Migration screen, where you can see the available balance and slide to transfer your Rubi to the wallet.
Sending assets:
To send assets, follow these steps:
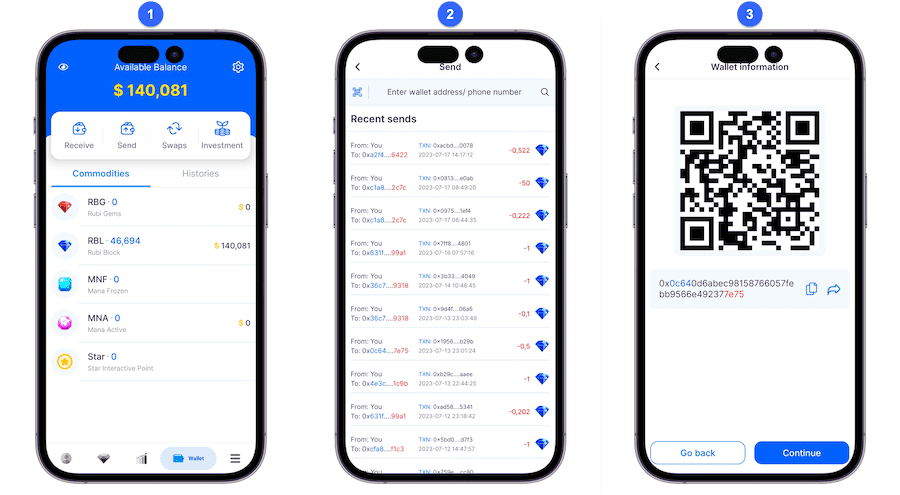
Step 1: In the wallet interface, select "Send," and then you can find the recipient's address using one of three ways:
• Image (1) wallet interface
• Image (2) search address by scanning QR code or pasting the wallet address.
• Image (3) result when you find the wallet address.
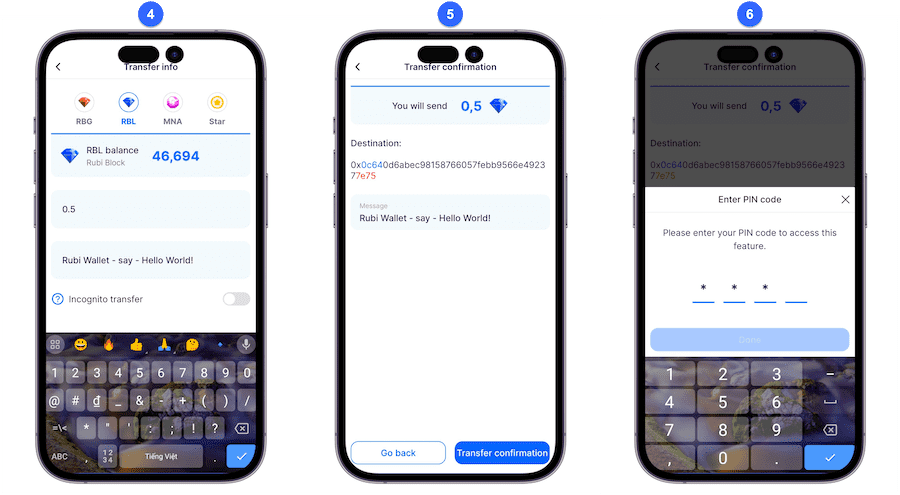
Step 2: Choose the asset and quantity to transfer.
• Image (4) - Here, you select the asset, see the corresponding available balance, choose the quantity to transfer, and enter a message.
• Image (5) - Double-check the quantity and wallet address - you can quickly see the beginning and ending characters of the wallet for verification.
• Image (6) - You'll be asked to enter a Pi code to complete the asset transfer from the wallet.
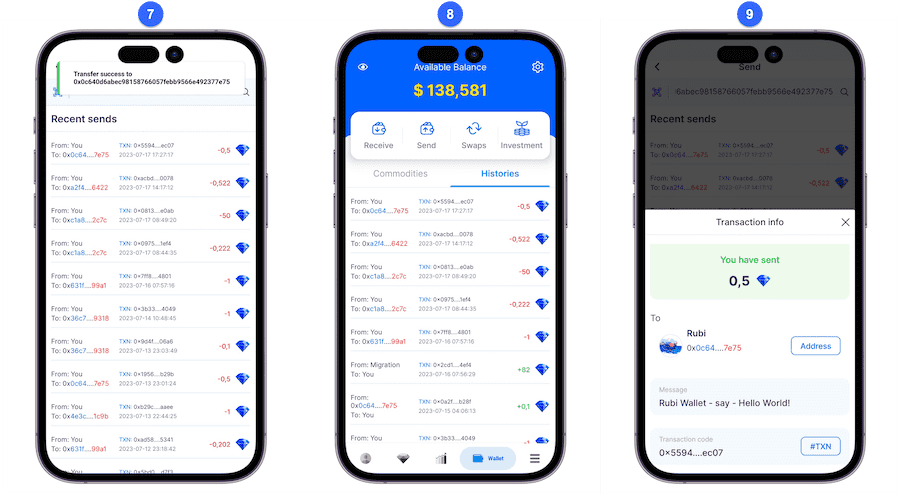
Step 3: Complete and transaction history
• Image (7) - Immediately after transferring, you'll receive a notification at the top of the app, and the transaction history will appear.
• Image (8) - Go back to the wallet to check the transaction history.
• Image (9) - Click on the latest transaction to review the details.
That's a guide on using RUBI Wallet with simple and quick steps. Best wishes for a successful experience!
Regards,
Rubi Support Team!


Comments (28)
kiki100
why is my prasha password different even though I have copied and saved it in my email, when I try to open it again it turns out the prasha password is different
0 Trả lời Chia sẻ 04:49 26/03/2024
0 trả lời
Lawal110
Hello ???? Please how do I go about kyc
0 Trả lời Chia sẻ 03:36 06/10/2023
0 trả lời
damii11
Good morning my Rubi
0 Trả lời Chia sẻ 16:49 02/10/2023
0 trả lời
shahsaid
Hello
0 Trả lời Chia sẻ 13:02 28/09/2023
0 trả lời
akinbolawa
Please i can't remember my passcode of my wallet what can i do to it please
1 Trả lời Chia sẻ 16:05 16/09/2023
0 trả lời